If you sell products online, you already know that getting product images web-ready isn’t as simple as uploading an asset and hitting publish.
You need to make sure your images are in the right file format, the correct resolution, and cropped to the ideal size. Plus, every platform — from Shopify to social media to email marketing tools — comes with its own set of image requirements.
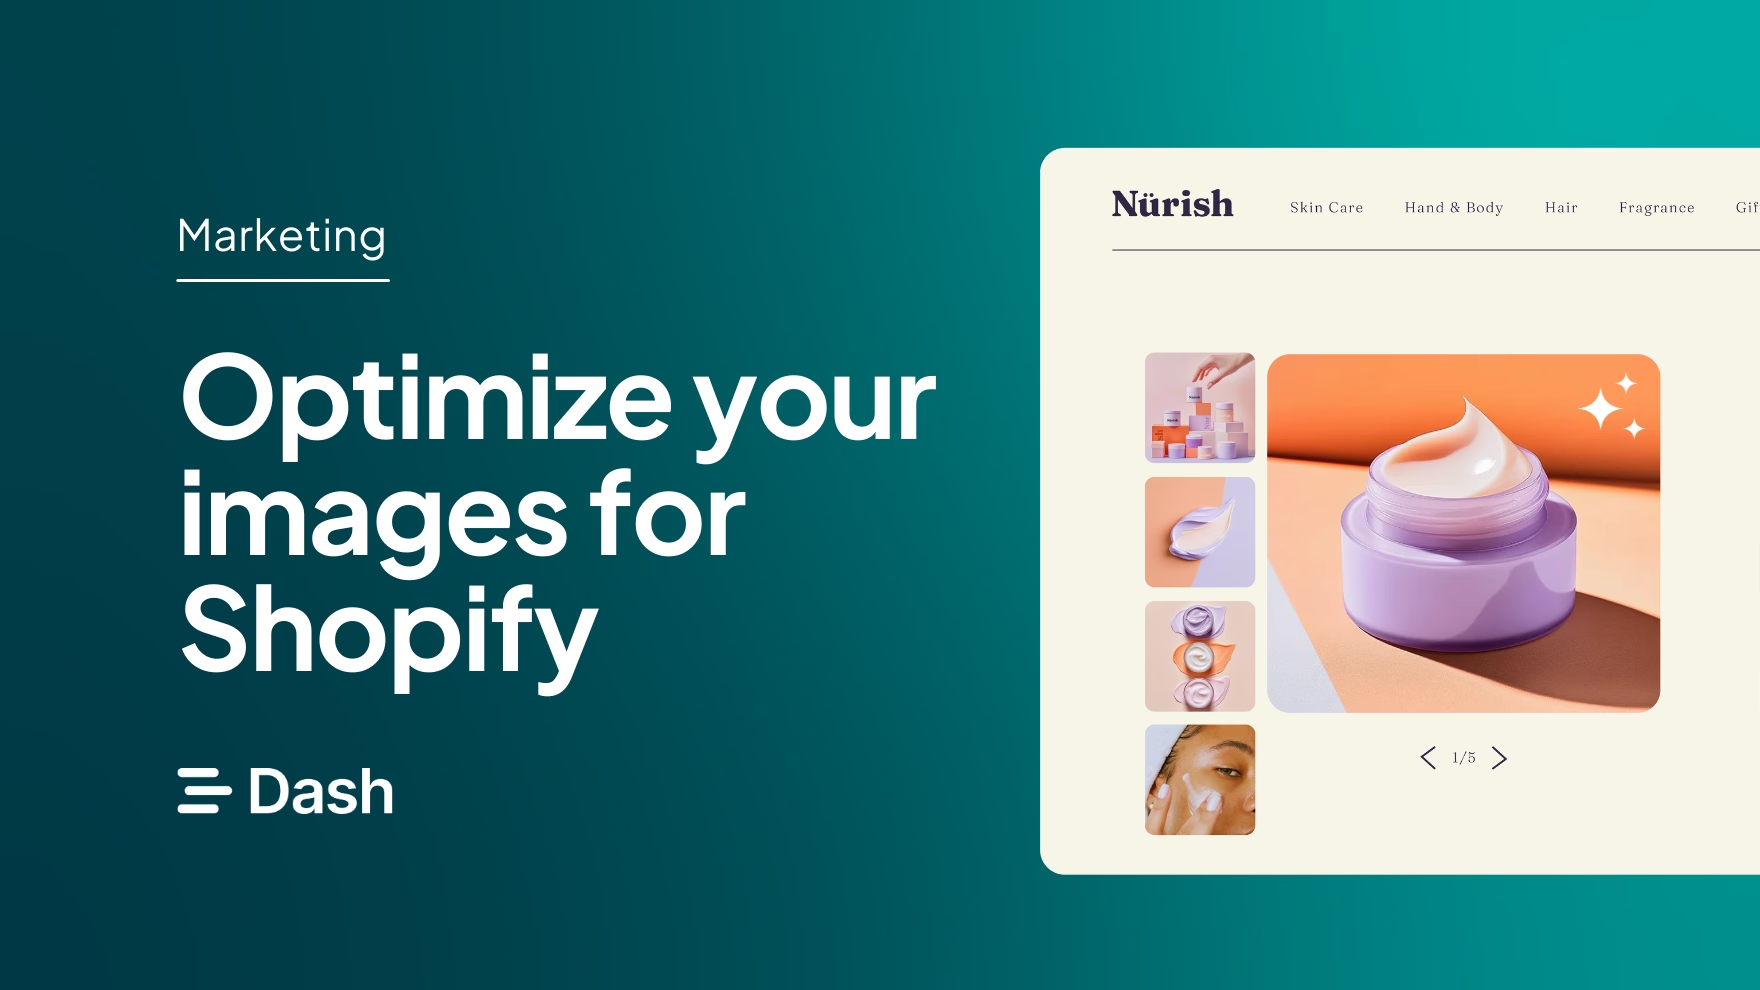
In this article, we’re going to focus specifically on Shopify image optimization. When you get this step right, you can feel confident you’re getting the most out of your product images, which can ultimately help boost your website conversions. 💸
Why do I need to optimise my images?
In short: unoptimised images slow down your site, hurt the customer experience, and can cost you sales.
If your images are too large, the wrong format, or not built for the platform they’re displayed on, they’ll drag down your page speed — especially on mobile. And when pages load slowly, shoppers bounce. It’s that simple.
Image optimisation ensures your visuals load quickly, display correctly, and work seamlessly across devices.
That includes compressing and resizing files, choosing the right image format, adding alt text, and tailoring each image to its specific use case (we’ll get into the details shortly).
First, let's look at some other reasons why Shopify image optimisation is worth prioritising.
1. It helps your website load faster
Large images take up a lot of your website's bandwidth usage, slowing down page load time. If this happens, your visitors are less likely to hang around, which will negatively impact your store's conversion rate. In fact, 53% of mobile visitors will abandon your website if it takes more than three seconds to load.
By compressing and resizing your Shopify product images, your website will load faster without sacrificing image quality. You'll provide your potential customers with a better user experience and have a higher chance of converting them.
2. It makes your Shopify store more accessible
Accessibility means making your website available to people with disabilities. Adding ALT texts to images, for example, helps people with visual impairments to understand what the images are about. Screen readers scan and read ALT texts aloud to visually impaired website visitors.
Great accessibility improves your website's user experience for potential customers. This can lead to more traffic and longer time spent on your website, which can improve your site's SEO ranking.
3. It improves your performance in organic search results
Images make up 19% of Google search results. Optimising your images makes it easier for search engine crawlers to scan these images, understand what they mean and index them in search results. In turn, this improves your Shopify site's search engine ranking - when people search for relevant keywords, search engines can map them back to your images.
9 steps to Shopify image optimization
Now you know why optimising images is important, let's get into how you can improve them on Shopify.
1. Use the best images possible
Before anything else, make sure you're working with the best version of your images in the right format. Otherwise you'll spend a lot of time optimising images and the final result won't be compatible with Shopify or meet its high-quality standards.
Great product photography increases conversion rate and reduces customer support headaches post-purchase. Hardly surprising when customers can't see, hear, smell, touch or taste the actual product before they buy it.
Wondering how to take the best pictures for Shopify? Our ecommerce product photography guide will give you some ideas.
2. Choose the right type of image file for different Shopify pages
Shopify supports a wide range of image file types, including JPG/JPEG, PNG, GIF, SVG, HEIC, WebP, PSD, TIFF, and BMP — all of which can be uploaded through your Shopify admin.
Here’s the important bit: Shopify’s image system automatically detects what formats a visitor’s browser supports and serves the best-performing format available. That means even if you upload a JPG or PNG, Shopify may deliver it as a WebP or AVIF file to browsers that support those modern formats, helping your images load faster without you having to manually convert them.
So which format should you use?
- JPG/JPEG: Best all-round format for product photography — offers a good balance between quality and file size.
- PNG: Ideal for logos, graphics, and images that need transparent backgrounds.
- WebP: A modern web format that offers smaller file sizes with strong image quality. Shopify will often serve this format to supported browsers for better performance.
In most cases, JPG or WebP are your safest bets for product images, with PNG used when transparency is required.
Read up on the different image types in our article, PNG vs JPG.
3. Compress your images
Image compression means reducing your file size so your image uses less data and loads faster. Simply resizing an image (making it appear smaller or larger) isn’t the same thing. If the file itself isn’t compressed, it can still slow your site down — even if it looks small on screen.
Here’s what to know about Shopify image limits and best practices:
- Maximum dimensions: Shopify allows uploads up to 5000 x 5000 pixels. You won’t usually need images this large — unless you’re using them for full-width banners or background sections.
- Maximum file size: Shopify supports image files up to 20 MB, but that doesn’t mean you should use the full allowance. For performance, it’s best to keep most product images under 2–3 MB where possible.
- Recommended product image size: For square product images, 2048 x 2048 pixels is a strong benchmark. It’s large enough to enable zoom functionality while keeping file sizes manageable.
Shopify automatically generates multiple scaled versions of your images through its CDN and serves the most appropriate size based on the visitor’s device and screen resolution. That’s helpful — but it doesn’t replace proper optimisation. Starting with a well-sized, compressed original file ensures the best performance across the board.
💡 We go into more detail on the best Shopify image sizes—plus examples of ecommerce brands using Shopify beautifully—in our full guide.
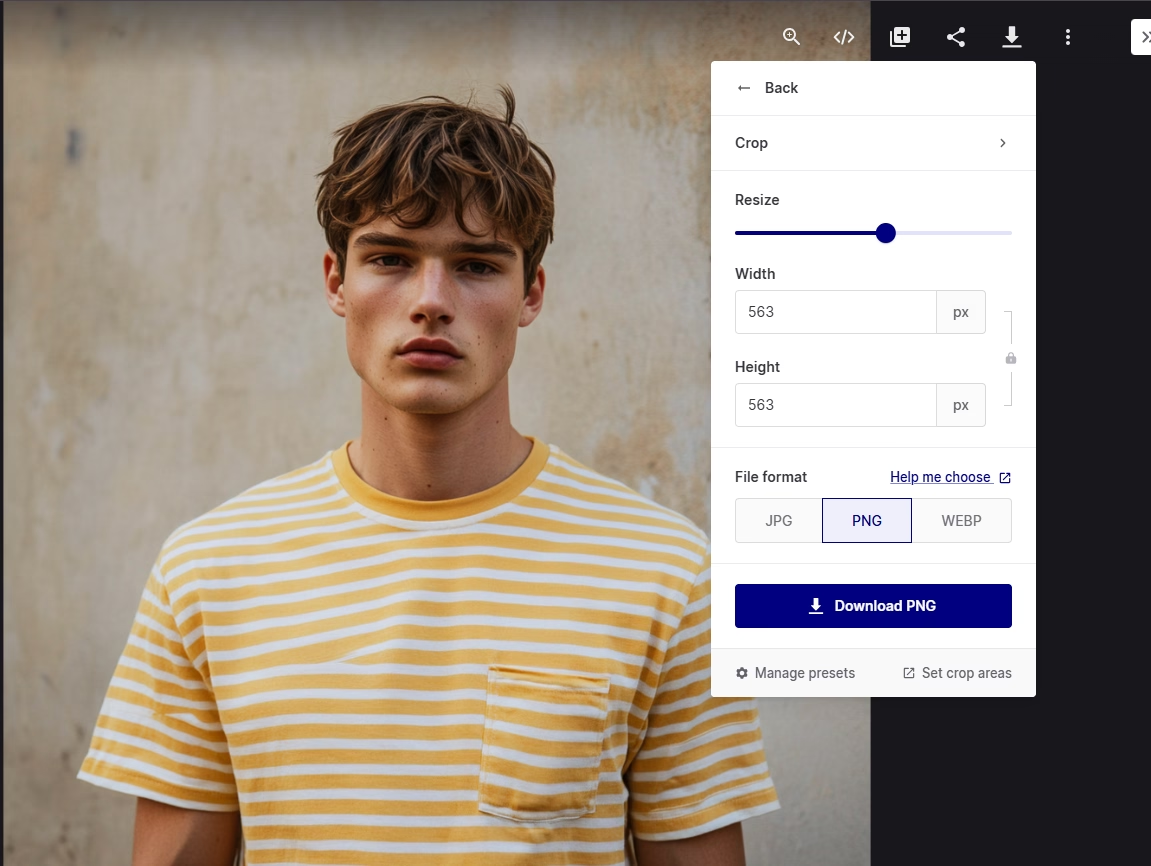
If you’re using a digital asset management (DAM) tool like Dash, you can resize and compress images directly when downloading them — no extra software needed:
To compress an image and reduce file size in Dash:
- In your Dash, go to the image you want to download. (You can browse through your library, or use the search bar and filters to find a specific asset)
- Open your image in the asset preview screen and click the ‘download’ button
- Pick whether you want to download your image as a JPG, PNG or WebP file.
- Select from the resize presets available or click ‘custom download’
- From here, you can add your own crop sizes or resize your images to a specific dimension.
To compress an image and reduce the file size manually on a Mac:
- Choose the original image you want to compress
- Right-click and open it in Preview
- Choose Tools>Adjust Size, then select Resample image
- Enter a smaller value in the Resolution field
- The new size will be shown at the bottom of the window
- Name and save the compressed image
To compress an image and reduce the file size manually on a PC:
- Select the image you want to compress
- Click the Picture Tools Format tab
- Click Compress Pictures
- Under Resolution, click Print, Web or Email
- Click OK
- Name and save the compressed image
You can read more about apps that help make it easier to run your ecommerce store on Shopify in our post: Top 36 Shopify apps.
4. Resize your images
Once you've compressed your image, you'll need to resize it too. This means adjusting its dimensions to match Shopify's image size requirements.
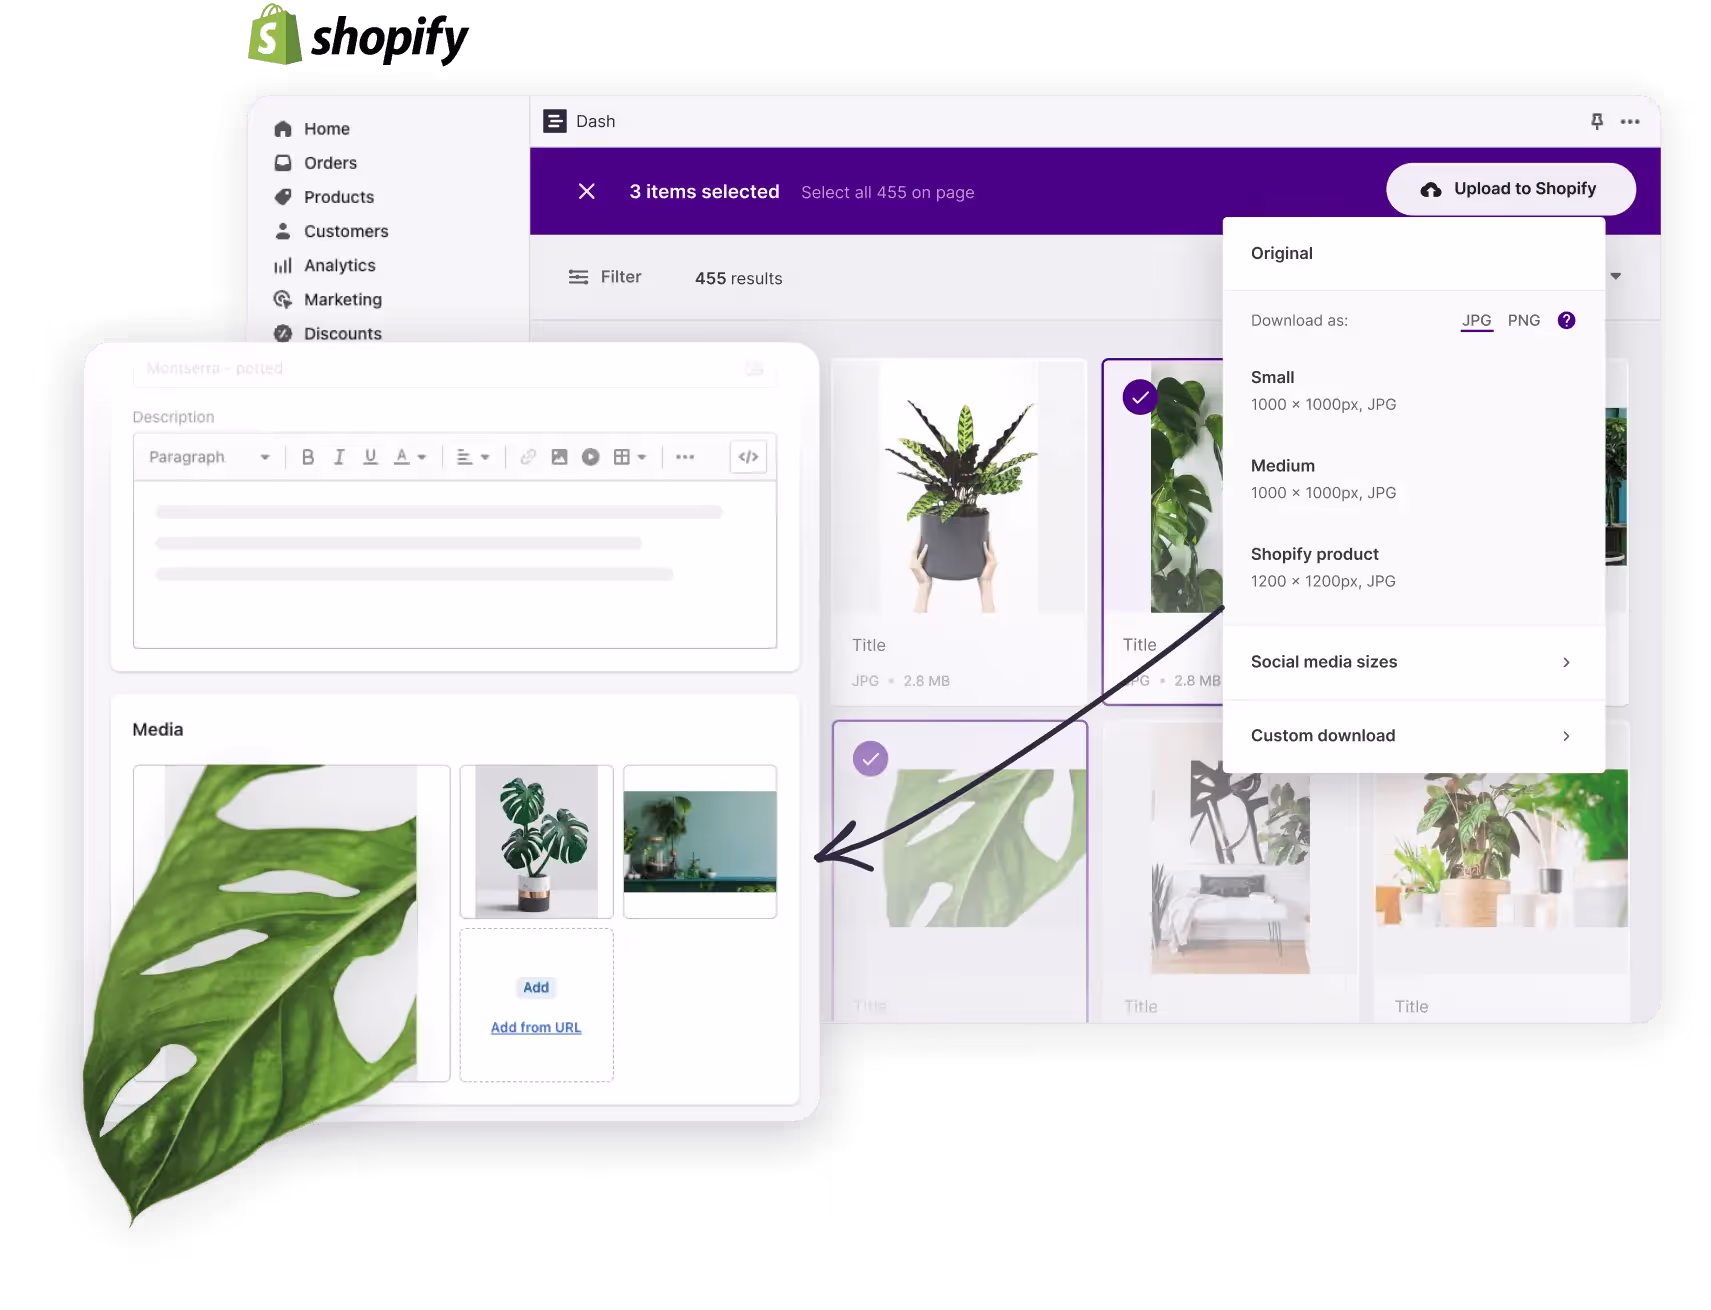
If you're using Dash, it couldn't be easier to resize your images for Shopify. 🙌
In Dash, you can create crop areas that are specific to your Shopify product listings. To do this within the app, open an image > click the three dots on the top right-hand corner > and select ‘set crop areas'.
Here you can see what crop areas you have set up, or you can manage your preferences and create your own custom crops.
Next time you or someone in your team syncs up with Shopify, it'll automatically use that crop.
5. Make sure your images are responsive
Responsive images are images that ‘respond' to whatever device they're being viewed on. They automatically work on different screen sizes and resolutions.
If you've set up your Shopify page on a desktop, how you see your images might be very different to how someone sees them on their mobile. They could be too small, unclear or have the wrong orientation, which makes for a poor user experience.
Shopify does automatically resize your images to fit mobiles, but if you want to be certain there are no hiccups, use a modern and responsive Shopify theme. These will automatically generate blocks of HTML that instruct browsers to load specific image sizes based on the device being used.
Optimising Shopify images for search engines increases their chances of showing up in image search results, creating more organic visibility for your store. You might not rank high in web search results, but if you do ecommerce image optimisation right, you will rank high in image results. This can drive more direct traffic to your Shopify store.
6. Create an image sitemap for SEO
If you use a lot of carousels, image pop-ups or galleries on your site, you should create a separate sitemap for images. An image sitemap lists all your images and how they are connected to help search engines, and visitors find what they're looking for quickly.
While moving graphics enhance customer experience, they can be missed by your search engine. A site map of your images will show Google exactly what's on your site and ensure every part of it is crawled – helping your SEO efforts.
But unless you're particularly tech-savvy, you might want to ask a developer to do this for you.
Check out Google's image sitemaps guide for a full run down.
7. Give your images relevant names
This may sound obvious, but not naming your images properly can make file management super difficult. Just think: if you're uploading images from your shared drives into Shopify, trawling through image names like IMG_1234567.JPG or BERGR8659JAN.JPG isn't helpful. It turns into a guessing game - and one that takes up way too much time.
Once they're in your Shopify store, you won't be helping search engines find your products and rank your page either.
Make sure you've got proper naming conventions for your images. Use descriptive, keyword-rich file names that describe the picture clearly, using hyphens between each one. For example:
- Instead of BERGR8659JAN.JPG
- Call it ‘women-beret-green-colour.jpg'
💡Dash lets you drop images directly into Shopify so you won't have to guess whether you've got the right image or click through loads of tiny thumbnail images.
8. Add ALT text to improve readability and SEO
ALT text (short for alternative text) is an HTML attribute used to describe an image in code. Its main role is to help screen-reading tools convey what an image shows to people with visual impairments, and it also gives search engines context about your visuals — which can help your Shopify store’s SEO and visibility.
When writing ALT text, follow these current best practices:
- Be descriptive and accurate: Describe what’s actually in the image.
- Keep it concise: Shopify recommends keeping ALT text brief and descriptive — up to 512 characters, but 125 or fewer is generally best for readability.
- Avoid keyword stuffing: Don’t pack unrelated keywords into the text — it doesn’t help accessibility and can harm SEO.
Use empty ALT (alt="") for purely decorative images: If the image doesn’t add meaning (e.g., decorative icons or background graphics), skip it so screen readers ignore it.
For example:
- Poor ALT text: “Special offer on women’s berets 50% off” — this focuses on promotions, not what the image shows.
- Better ALT text: “Woman wearing a green beret with a slight smile” — descriptive and focused on what’s visually present.
9. Continuously test the performance of your Shopify images
You’d think having done all this work you could just sit back and wait for your customers to roll into your Shopify store. If only. You’ll need to keep testing your images to make sure they keep looking good, loading quickly and helping your SEO efforts.
- Test appearance: see how your images look on different devices (Mac, PC, mobile, tablet) and adjust anything that’s not working well
- Test SEO: you can’t really test if your images are helping your SEO, but you can check if they all have ALT text using tools such as AdResults
- Test loading speed: use tools such as SpeedBoost to see if your images are slowing things down
- Test on other people’s devices: if you repeatedly use your own mobile or laptop to visit your store or search for products on it, you’ll get unrealistic results - the only way to check how high your site is ranking is to use someone else’s device or a search engine such as Brave Search or DuckDuckGo.
The best Shopify image optimisation tools
We already hinted at image optimisation tools at different points in this article. Here, we’ll talk more about some of the tools we already mentioned and introduce you to some other online tools that can help you optimise your Shopify store.
1. Dash: For automatically resizing Shopify product images
Dash is a digital asset management tool that helps you organise and deploy product images quickly.
In Dash, you can automatically resize product photos to match Shopify’s correct dimensions (which we already covered extensively). You can also save these dimensions as image preset sizes and apply them to subsequent images automatically. That way, you won’t need to resize images from scratch anymore.
Beyond image resizing, Dash integrates with Shopify. This allows you to upload new or updated product images from Dash to Shopify right in your Shopify store backend.
2. Squoosh: For compressing images
Squoosh is an intuitive image compressor that you can use to quickly shrink images, transform image dimensions and optimize your images. One of the notable features of Squoosh is that you get a side-by-side comparison of what your content looks like before and after compression. You can also pick what file format your image should be downloaded as. Swap a PNG for a JPG, a JPG for a WebP - and so on.
3. Ahrefs: For generating ALT text
Ahrefs is a popular SEO tool, but it also has a free AI ALT text generator. You upload your image to the web application, and the AI generates possible ALT texts you can use for it.
You can add an image description to guide the AI’s output. You can also choose from multiple tone variants to match your brand voice.
💡Ahrefs is a SEO tool we use reguarly at Dash. Check out Barney's article that explores some of the top marketing apps for small businesses.
4. XML Sitemaps: For generating Google sitemaps
If your Shopify store has only a handful of product pages, you might be able to create a sitemap for it manually. But if you have hundreds or thousands of pages, then it’s more efficient to use a sitemap generator like XML sitemaps.
This tool lets you create Google sitemaps for free for up to 500 web pages. You can automatically add specific page attributes to your sitemap, like Page Priority Attribute and Page Last Modification. When it’s done, download the sitemap file and submit it via your website’s Google Search Console.
5. Pingdom: For testing your website’s speed
Pingdom's Site Speed Test is like a speedometer for your website, showing you how fast it loads for visitors. It breaks down everything that goes into loading your webpage, like pictures, code, and styles, to see what's slowing it down. It even gives your site a grade, like a report card, to show how well-optimised it is.
Using colourful charts and graphs, Pingdom helps you see exactly what's causing delays. It then gives you personalised tips, like ways to make your images smaller or use browser tricks to speed things up. Plus, it keeps track of your site's speed over time, so you can see if your improvements are working.
How to keep your brand’s images organised
Having created so many different image files for different purposes, it’s easy to get confused trying to differentiate one version of an image from another.
That’s why you should use Dash to find, organise and upload your images. We’re a digital asset management tool that provides a home for all your product shots and brand assets. You can store and organise your visual content, as well as share product images with marketplaces, resellers and agencies. And, as we mentioned in this article, you can crop and resize your images to suit all the different requirements of your channels.
Even better, you can connect your Dash to your Shopify account directly. No need to download images from Dash first and then upload them to Shopify. Just search for the shots you want in Dash then drop them straight into the Shopify page.
Your product images are an important part of your Shopify store, so make sure you’re organising them properly in Dash. It’s the home for your visual content and the perfect ecommerce DAM.
Try it for yourself. Sign up for Dash for free for 14 days. You don’t even need a credit card. ✨
FAQs about Shopify image optimization
Why does Shopify make my images blurry?
Shopify doesn’t deliberately reduce quality, but images can look blurry if the file you uploaded is too small and gets stretched to fit your theme. This is especially common on mobile or Retina screens. To fix it, upload a higher-resolution version (around 2048px wide for product images is usually a safe bet).
How do I optimize an image?
To optimise an image, you need to resize it to the correct dimensions, compress the file size so it loads quickly, choose the right format (like JPG or WebP), and add ALT text. The goal is to keep images sharp without slowing down your site.
How do I increase image quality?
If an image is already low-quality or blurry, you usually can’t “increase” its quality — you’ll need a better original file. The best way to improve quality is to start with a high-resolution image and export it at the correct size before uploading to Shopify.
What is the best resolution for high quality images?
For Shopify product images, 2048 x 2048 pixels is a strong benchmark. It gives you good clarity and zoom functionality without creating massive files that slow your site down.
How do I increase visual stability on Shopify?
Visual stability improves when Shopify knows exactly how much space your images will take up before they load. Using consistent image dimensions and uploading properly sized images helps prevent layout shifts, which makes your store feel smoother and more professional (and improves Core Web Vitals too).

Lorraine Forrest-Turner is a professional copywriter, published author, playwright and communication skills tutor.