Whether you’re collecting customer content, working with a photographer on location, or chasing video files from a freelance editor, gathering new visual assets can quickly become a headache. Files arrive via email, WeTransfer links expire, feedback gets lost in threads, and by the time content is approved, no one can find it.
Dash’s guest upload feature fixes this.
It lets customers, photographers, videographers, creators, and partners upload photos or videos directly into your digital asset manager — without needing a login. That means your team stays in full control of where assets live, how they’re reviewed, and when they’re ready to use.
In this product guide, we’ll show how Dash’s guest uploads work and how to approve, organise and share content you collect out in the wild.
What is Dash?
Before we jump into Dash’s guest upload feature, here’s a short overview of Dash.
Dash is a digital asset management (DAM) tool for ecommerce teams. It’s where your product photos, videos, user generated content (UGC), and campaign assets live. They’re organised, easy to search, and ready to share.
Hop over to our article that breaks down Dash’s digital asset management features for more information.
What are guest uploads?
Guest uploads let people outside your team upload photos and videos directly into Dash without needing to login. It’s a simple way to collect UGC, photographer content, or influencer assets without messy email threads or expiring file links.
You choose where those files land, review everything before it’s used, and keep your library organised from the start.
Guest uploads let people outside your team upload photos and videos directly into Dash without needing to log in. It’s a simple way to collect assets from customers, photographers, videographers, influencers or customers.
You choose where those files land, review everything before it’s used, and keep your library organised from the start.
How to set up a guest upload link in Dash
Here’s a step-by-step guide to creating and using guest upload links in Dash.
1. Create a guest upload link for your photographers and UGC campaigns
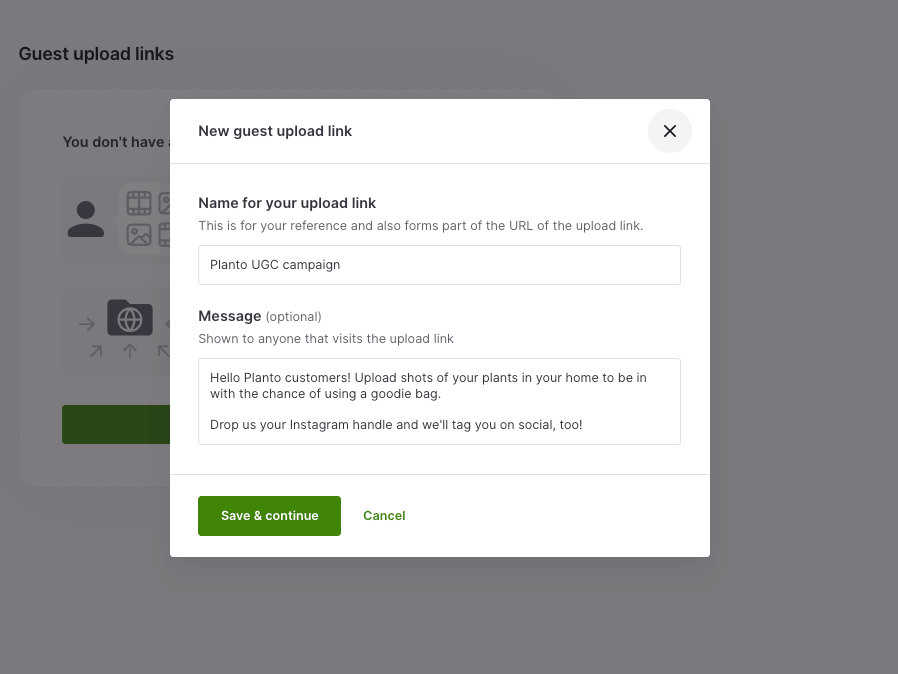
Start by logging into your Dash account and heading to Admin → Guest upload links. From here, you can create and manage multiple guest upload links for different campaigns, creators, or partners.
When setting up a new link:
- Give it a clear name (for example, Summer 26 photoshoot or UGC – Instagram Campaign)
- Add a welcome message explaining what you’re asking for and how the content will be used
2. Automatically organise incoming UGC into the right folder
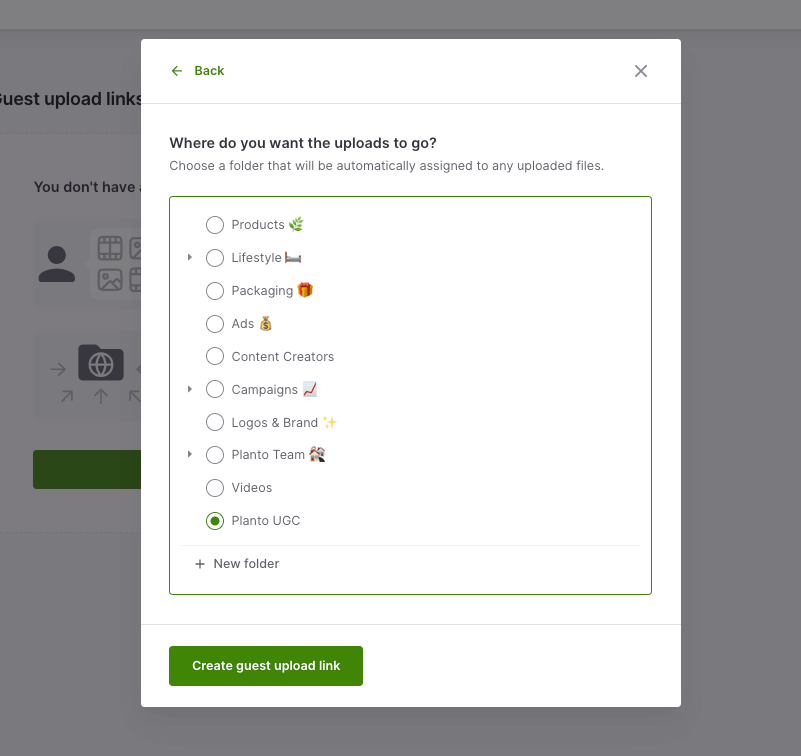
Next, choose where guest uploads should live in Dash.
You can select an existing folder or create a new one specifically for that shoot or project. Every photo or video submitted through that link will land there automatically (once you’ve approved it), so there’s no manual sorting required.
This makes it easy to keep different asset types separate — like product photography, lifestyle shoots, customer content, and video edits — while still making everything quick to find later.
3. Let guests upload content
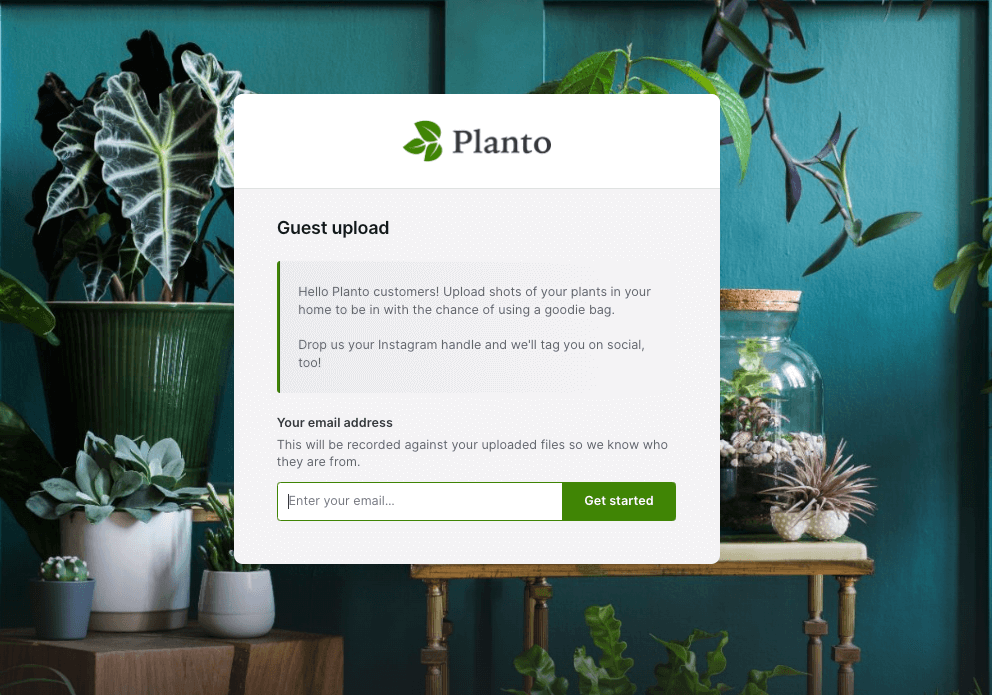
Once your guest upload link is live, the rest is over to creators.
They simply open the link, enter their email address, and upload their photos or videos.
For ecommerce teams, this is especially handy when you’re coordinating with multiple people at once (a photographer, a freelance retoucher, a creator, and someone on your team).
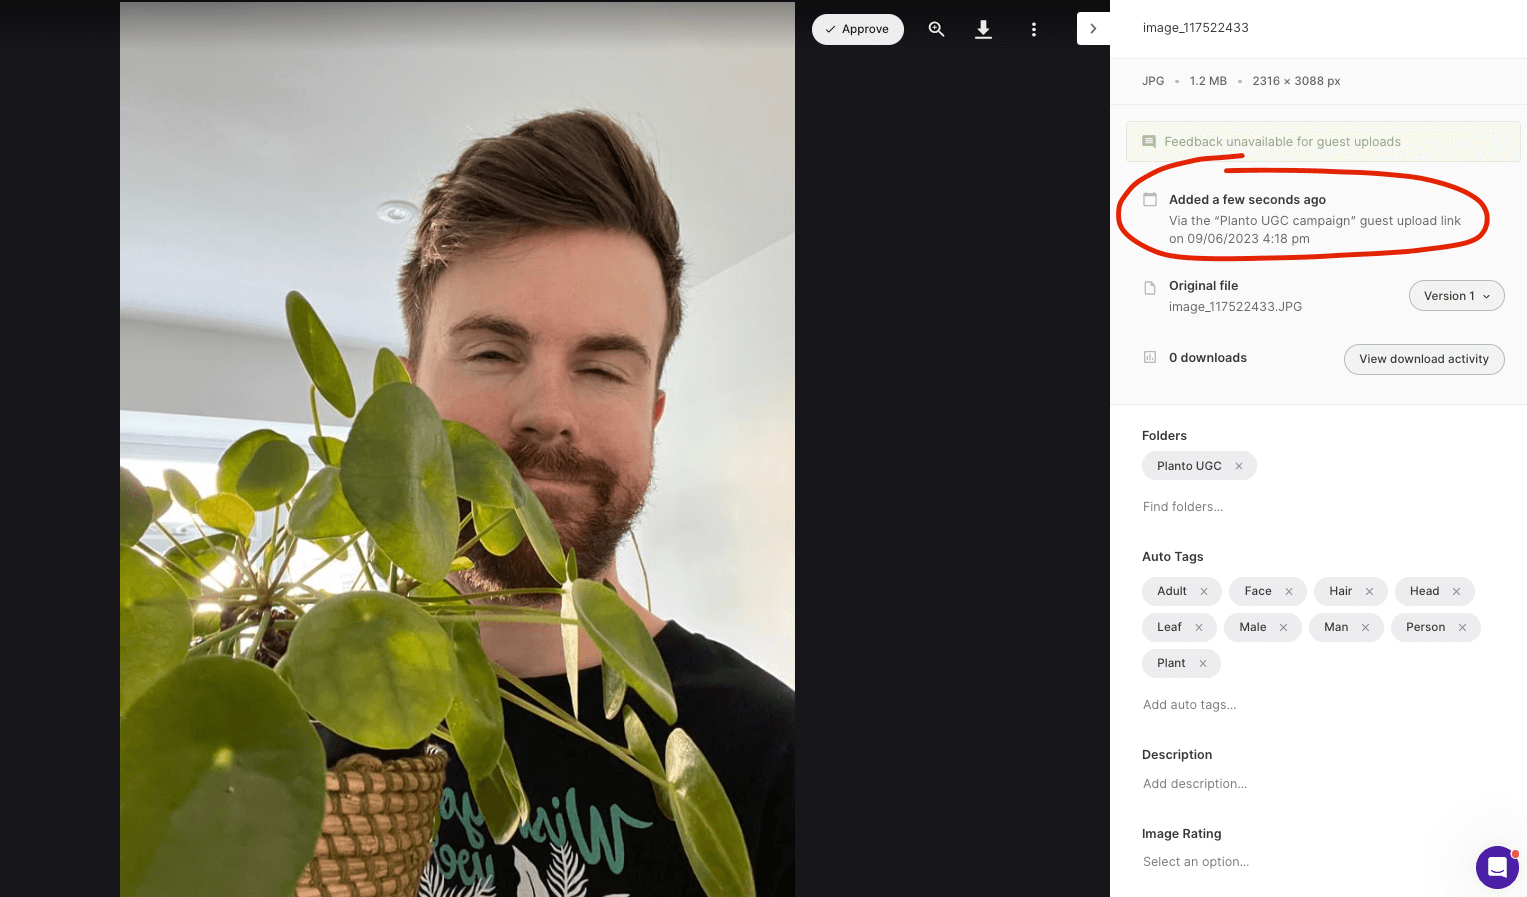
4. Review and approve uploads before they hit your library
As new content comes in, Dash admins are notified from their homepage that assets are waiting for approval.
Each asset shows:
- Who uploaded it
- Which guest upload link it came from
- Where it will live once approved
From there, your team can review each image or video and either approve or reject it. Rejected assets aren’t added to your library, and contributors aren’t notified, keeping the experience smooth on both sides.
Approved content is instantly available to the rest of your team, ready to be used across product pages, email, paid social, retail listings, press packs — wherever you need it.
Make the most of your guest uploads
Collecting creative content is a big part of the job, but the real value comes from what happens next: staying organised, keeping standards high, and making content easy to reuse.
Here are a few ways ecommerce teams use guest uploads once files are in Dash:
- Speed up launches by collecting photos and videos straight into the right folders (so nothing gets lost mid-project)
- Reuse content across channels (email, ads, socials, product pages, retail partner portals) instead of letting good work disappear into old links
- Build a cleaner library long-term, with assets already sorted by shoot/campaign/partner from day one
- Support partners faster, whether that’s creators needing a smooth handoff or retail teams needing the latest approved visuals
With everything organised, reviewed, and easy to find in Dash, your team can spend less time chasing files and more time actually using them.
Try guest uploads in Dash for free — grab a 14-day trial.

Barney is the Marketing Lead for Dash. He writes about small business marketing strategies and how DTC brands can boost sales.

